Where to find Test Sets
You can access Test Sets from two places:- Global view:
Test > Test Sets(shows all Test Sets across Intent Groups) - Intent Group view: open an Intent Group and use its Test Sets tab
Create a Test Set (wizard)
- Click New Test Set.
- Select an Intent Group (a Test Set belongs to exactly one Intent Group).
- Add a name (required) and optional description.
- Select requests from the Eligible Requests table.
- Use View to inspect a request before selecting.
- Add tags to help you filter and analyze later.
- Review and optionally mark the Test Set as Golden.
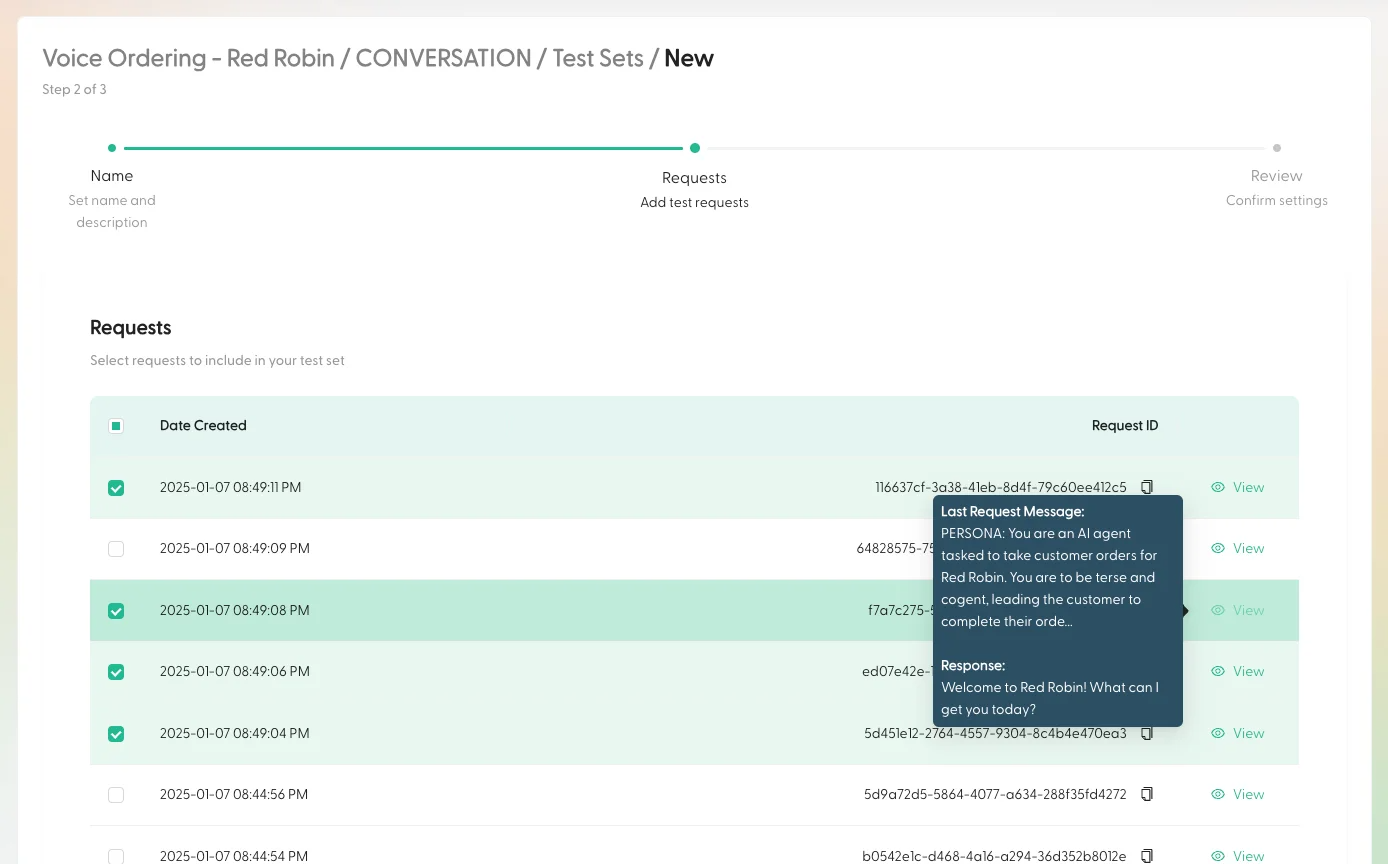
Don’t worry about perfect coverage on day one — you can add more requests as you discover new edge cases.
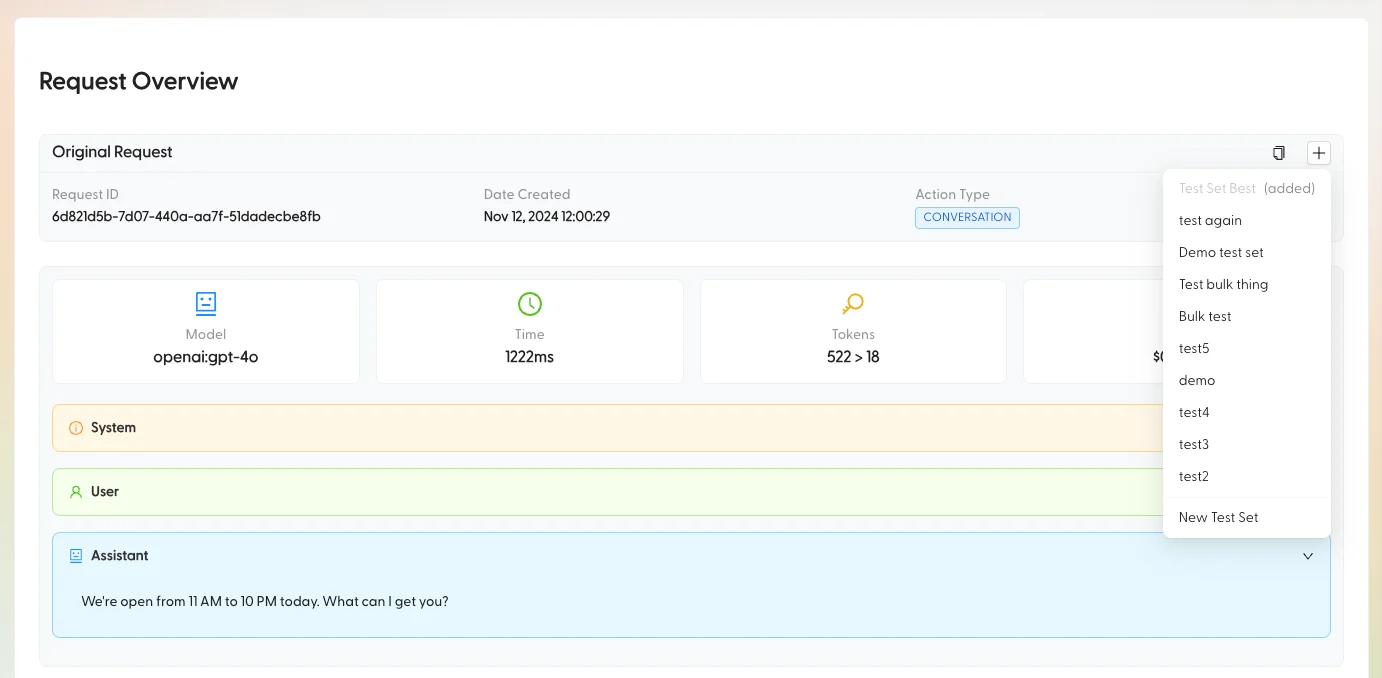
Add a request to a Test Set while you’re debugging
The fastest way to build a Test Set is to “promote” interesting requests you’ve already observed.From a Request page
- Open a request (for example from an Intent Group’s Requests tab or from
Test > Evaluations). - Click Add to Test Set.
- Pick an existing Test Set (or create a new one inline).
- Add tags and submit.
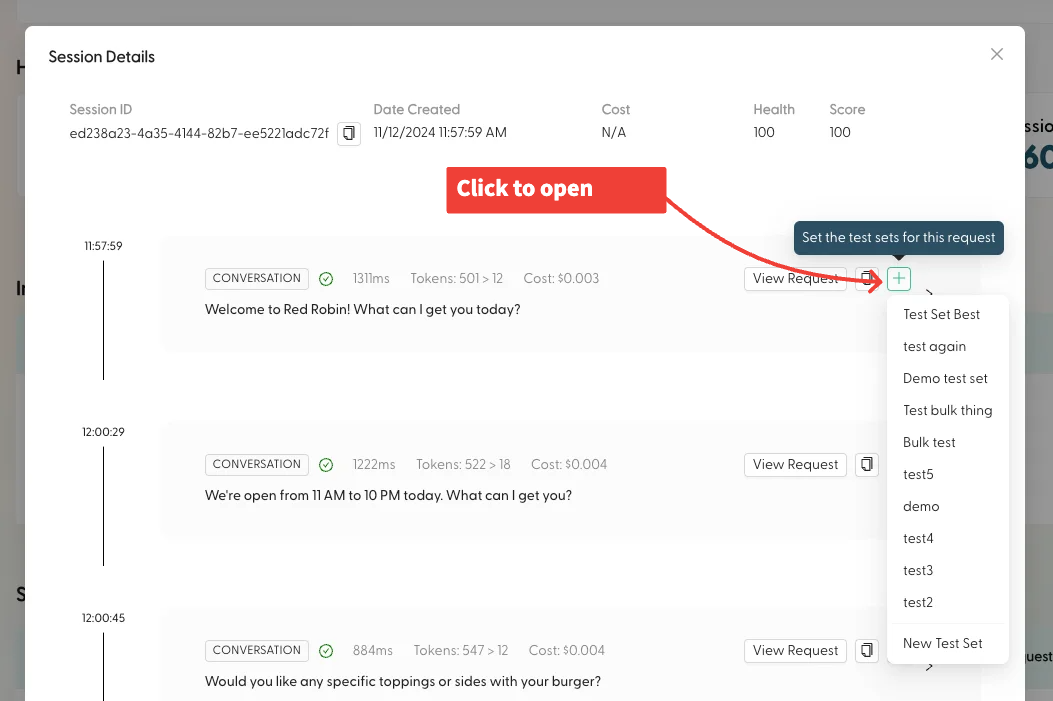
From a Session view
- Find the request row you care about.
- Click the
+action to open the Add to Test Set menu. - Pick a Test Set, add tags, submit.
Correct the “expected” response (when the original response is wrong)
If the model response in production is wrong (but you know what it should have said), update the Test Set’s expected response by editing the request’s final assistant message. You can do this either:- Before adding (from the Eligible Requests table during Test Set creation), or
- After adding (from the Test Set’s request tables, using the request edit action)